Manufacturer | ITEQ |
---|---|
Part Number | IT017 |
Product Dimensions | 8 x 2.2 x 2.2 cm; 820 g |
Item model number | 13 |
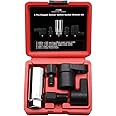
Size | 7/8” 3/8” 1/2” |
Colour | Black White |
Finish | Powder Coated |
Material | Chrome Vanadium Steel |
Item Package Quantity | 1 |
Head Style | Hex |
Batteries Included? | No |
Batteries Required? | No |
Item Weight | 820 g |
Country of origin | China |

ITEQ 5 Pcs Automotive Oxygen Sensor Socket SetITEQ
Image Unavailable
Image not available for
Colour:
Colour:
-
-
-
- To view this video, download
-
-
-
-
-
-
-
VIDEO
-
ITEQ 5 Pcs Automotive Oxygen Sensor Socket Wrench Remover tool and Thread Chaser Set
To see product details, add this item to your cart. You can always remove it later.
Purchase options and add-ons
Colour | Black White |
Brand | ITEQ |
Material | Chrome Vanadium Steel |
Item length | 0.08 Meters |
Item weight | 820 Grams |
Item package quantity | 1 |
Head style | Hex |
Finish type | Powder Coated |
Operation mode | Manual |
Manufacturer | ITEQ |
About this item
- Perfect tool set for removing, inspecting, replacing and installing heated and non heated oxygen sensors and vacuum switches on most vehicles with computer-controlled engines
- 3 types of universal socket wrenchs cover various situations of oxygen sensor location
- 6-point 7/8” (22mm) socket opening fits all hexagon oxygen sensor, common 3/8” and 1/2” drive ends can be used with ratchet or breaker bar
- Special side cutout design allows easy access to oxygen sensors from any section and prevents damage to wires
- Set Including: 1-pc 3/8” Dr. extra deep broach socket (3-1/8” long), 1-pc 3/8” Dr. low-profile crowfoot socket wrench (1-1/4” long), 1-pc 1/2” Dr. offset crowfoot socket wrench (1-15/16” long), 1-pc M18 x 1.5mm and 1-pc M12 x 1.25mm thread chasers with 3/8” drive to clean and repair damaged threads
Frequently bought together

This item: ITEQ 5 Pcs Automotive Oxygen Sensor Socket Wrench Remover tool and Thread Chaser Set
$30.99$30.99
Get it by Saturday, Jun 28
In Stock
$10.99$10.99
Get it by Saturday, Jun 28
In Stock
Total price:$00$00
To see our price, add these items to your cart.
Try again!
Added to Cart
Add both to Cart
These items are shipped from and sold by different sellers.
Choose items to buy together.
Videos for similar products
Product Description


5 Pcs Oxygen Sensor Switch Socket Wrench Kit and Thread Chaser Set
- Perfect for removing, inspecting, replacing and installing heated and non heated oxygen sensors found on most vehicles
- Cut-out and slotted design enables sockets to be fitted over wiring harness, offset and compact allows for extra leverage in hard to reach spots
- Including 3 oxygen sensor sockets and 2 thread chasers for cleaning and repairing damaged threads
- Construction of chrome vanadium steel for extra strength and durability


1/2" Drive Offset Socket
- Cut-out and slotted design
- Offset and compact socket
- Used with 1/2 inch drive

3/8" Drive Offset Socket
- Cut-out and slotted design
- Offset and compact socket
- Used with 3/8 inch drive

3/8" 80mm Socket
- Cut-out and slotted design
- Used with 3/8 inch square drive
- 3.149 inch length

3/8" Thread Chasers
- Features M18x1.5 and M1.5x1.25
- Used with 3/8 inch square drive or 3/4 inch hex socket


Package
High quality and hard plastic carrying case packs all tools for simple storage and organization
Product information
Technical Details
Additional Information
ASIN | B07P24HCY1 |
---|---|
Customer Reviews |
4.6 out of 5 stars |
鶹 Rank |
|
Date First Available | March 9 2019 |
Feedback
Compare with similar items
This Item ITEQ5 Pcs Automotive Oxygen Sensor Socket Wrench Remover tool and Thread Chaser Set | Recommendations | |||
Try again! Added to Cart spCSRF_Treatment Add to Cart | Try again! Added to Cart spCSRF_Treatment Add to Cart | Try again! Added to Cart spCSRF_Treatment Add to Cart | Try again! Added to Cart spCSRF_Treatment Add to Cart | |
Price | $30.99$30.99 | $35.99$35.99 | $39.35$39.35 | $23.45$23.45 |
Delivery | Get it by Saturday, Jun 28 | FREE Delivery | Get it by Saturday, Jun 28 | Get it by Saturday, Jun 28 |
Customer ratings | ||||
Sold by | ITEQ | Auto Parts Outlets | 鶹.ca | DASBETAUTO |
material | Chrome Vanadium Steel | Chrome Vanadium Steel | Alloy Steel Blend | Polycarbonate |
head style | Hex | Hex | Hex | Box End |
operation mode | Manual | Mechanical | Mechanical | Mechanical |
finish type | Powder Coated | Powder Coated | ['Chrome Plated', 'Black Oxide'] | Oil Rubbed |
Brands in this category on 鶹
Sponsored
Customer reviews
4.6 out of 5 stars
4.6 out of 5
2,371 global ratings
How are ratings calculated?
To calculate the overall star rating and percentage breakdown by star, we don’t use a simple average. Instead, our system considers things like how recent a review is and if the reviewer bought the item on 鶹. It also analyzes reviews to verify trustworthiness.
Top reviews from Canada
There was a problem filtering reviews. Please reload the page.
- Reviewed in Canada on June 18, 2025Verified PurchaseMade replacing the sensor easy
- Reviewed in Canada on March 20, 2025Verified Purchaseworked well
- Reviewed in Canada on February 20, 2025Verified PurchaseNicely wrapped package, did everything thing I required of it. Thread chasers where hardened threads , so no stripping of the threads when used on the rusty o2 sensor bungs.
- Reviewed in Canada on October 21, 2023Verified PurchaseThe sockets look heavy duty enough. I looked at one in a local automotive store and it was much thinner and the sale person said sometimes they stretch with a rusted in sensor. These look heavy enough, I did see a YouTube video which shows someone adding a hose worm gear clamp to eliminate stretching if using this on an extremely rusted sensor.
I did note and missed it that the smaller chaser is only 12 mm, not 14 mm. 14 is used on most autos, 12 is used on small engines, weed w hackers, chainsaws etc.
Overall quality looks good.
- Reviewed in Canada on November 22, 2024Verified PurchaseWorks perfect!
- Reviewed in Canada on November 14, 2024Verified PurchaseWorks great
-
Reviewed in Canada on June 7, 2024Verified PurchaseJe suis très satisfait merci !
- Reviewed in Canada on December 2, 2024Verified PurchaseI was undoing really stuck sensors on my 2009 ford f150, i ended up stripping out the head on the sensor, later i added a metal clamp on the bottom to keep it in place or you can use vicegrips. I ended up damaging one sensor before i realized how to do this correctly, either way it worked, but you have to be very careful and you don't change these often. Also I don't know if this tool will work unless you jack the car up quite high up.
Top reviews from other countries
- HankReviewed in the United States on August 14, 2020
5.0 out of 5 stars DON'T DICK AROUND - USE THE PROPER TOOLS....
Verified PurchaseUPDATE: Bosch states NOT to use any dialectic grease on their O2 sensor connectors. Seems that their sensors receive the required ambient air sample via the air traveling under the wire insulation of the harness. This seems UFB but my saving grace was that I only used a bit of DG on the face of the O2 sensor socket. The added pix of the OBD2 reader data stream DOES show a proper high/low voltage swing of both of my two new upstream sensors. (My old O2 sensors did read a similar high voltage- rich - but the low voltage swing never went below ~.6 .7 volts - again staying rich for most all of the time.
After buying the LAUNCH 529 Code Reader from 鶹 - ASIN - B0811JXH3M , I checked the output signal of my O2 sensors, (nice, real-time waveform), I noticed the Bank 1 sensor 1 (driver side), was indeed fluctuating, but, was not switching low enuf to indicate proper sensor operation. So, with about 50K miles PAST the recommend change interval, I ordered/received 4 of the Bosch 15510 O2 sensors from the "rocky place" for 110 bucks delivered. For my 08 RAM 1500 5.7 HEMI 2WD Quad Cab, the VIN number contained the "2" vehicle build descriptor and not the "D" descriptor which DOES make a difference. The OEM Dodge MOPAR PN for my truck is 56029049AA, used at all four locations. Anyway, from reading all the blogs and watching YT videos, I was getting ready for a VERY difficult time in the removal of these 149K mile original OEM sensors. (The pix show the old sensors were damn near disintegrated). I knew that I should not rely on the 22mm Craftsman OE side of the combination box wrench as the primary tool for the job and to be ready, I bought this socket kit. Others had stated that the longer chrome slotted socket would probably open up with the torque that may be required for removal, and some had suggested using a SS band clamp on the socket to keep the slotted socket from expanding. (didn't like that idea). AND, the long slotted socket WOULD NOT allow placing over the sensor wires and seat fully on the sensor hex portion. The bit longer slotted heavy crows-foot has a preferred 1/2 inch drive but had much thinner sidewalls than the shorter slotted crows-foot, which was a 3/8 drive. (see pix). As I wanted to remove ALL sensors intact, without cutting off the wires and using the 22mm 6 point DW socket, my thought was to use the shorter, slotted heavy crows-foot even though it was for a 3/8 drive. I was ready with the socket adapters - 1/2 to 3/8 adapter so to be able to muscle any tight sensor with the preferred 1/2 ratchet. For sheets and grins, I tried my Craftsman 22mm OE wrench, yea, I know, you shouldn't, but, I was able to loosen three of the four sensors with this OE wrench due to open access to the sensors and got lucky - and the fourth sensor - see short slotted heavy socket on sensor in pix - was easily removed with a 1/2 ratchet with the 1/2 to 3/8 adapter. Using a 1/2 ratchet provided a finer loosening and tightening movement in very small increments, not like being restricted to a socket on a square 1/2 drive breaker bar, you know what I mean, when there is little “throw” in the ratchet movement.
FYI – My truck was basically cold with only several minutes running to move from the carport to my flat(er) driveway. The exhaust system was just warm, not hot, when I started work. The picture where you can see the short heavy crows foot socket on the upstream side is from bank 2, passenger side for reference. The very open sensors shown in another pix are of the bank 1, driver’s side for reference.
I did not have to use “plan B” using the 1/2 drive 6 point 22mm DW socket which was to work on a cold exhaust system with cut wires for the 6 point 22mm DW socket use, heat the sensor bung only with a small torch, not the sensor itself, then after the bung was HOT, I had freeze spray ready to cool ONLY the sensor, (on the hex wrench part), so it would contract from the HOT sensor bung and make sensor removal easier. This plan was at the ready but did not have to use as all sensors only required ~20-25 ft lbs torque to remove and was easily accomplished with the 22mm OE wrench on three sensors. The fourth sensor, bank 2, upstream – shown in pix, needed the short heavy crows foot socket. (This new “pounds feet” designation is BS due to some sob’s decision to be more “politically correct”. To that I say STFU……… For me it will always be ft lbs… A good suggestion is to make certain you CAN loosen ALL of your sensors FIRST, NON-DESTRUCTIVELY, and NOT disconnecting any connectors, before changing any, since this is the hardest part you DO want to accomplish FIRST, and, IF you could not remove any of the sensors yourself, you would need to only retighten your sensors a bit for your drive to the shop for removal if needed. The rest is all downhill easy peasy…. My work time was about 2 hours or so, due to 2 years previous back surgery and not having a creeper, which was a real biatch…. P.S. ALWAYS use dielectric grease on electrical connectors and plugs to prevent any moisture or water intrusion. Just squeeze a small bit on the “face” of the new sensor connectors as shown in the pix with a small amount pushed into the connector “holes” and you’ll be good-to-go….
HankDON'T DICK AROUND - USE THE PROPER TOOLS....
Reviewed in the United States on August 14, 2020
After buying the LAUNCH 529 Code Reader from 鶹 - ASIN - B0811JXH3M , I checked the output signal of my O2 sensors, (nice, real-time waveform), I noticed the Bank 1 sensor 1 (driver side), was indeed fluctuating, but, was not switching low enuf to indicate proper sensor operation. So, with about 50K miles PAST the recommend change interval, I ordered/received 4 of the Bosch 15510 O2 sensors from the "rocky place" for 110 bucks delivered. For my 08 RAM 1500 5.7 HEMI 2WD Quad Cab, the VIN number contained the "2" vehicle build descriptor and not the "D" descriptor which DOES make a difference. The OEM Dodge MOPAR PN for my truck is 56029049AA, used at all four locations. Anyway, from reading all the blogs and watching YT videos, I was getting ready for a VERY difficult time in the removal of these 149K mile original OEM sensors. (The pix show the old sensors were damn near disintegrated). I knew that I should not rely on the 22mm Craftsman OE side of the combination box wrench as the primary tool for the job and to be ready, I bought this socket kit. Others had stated that the longer chrome slotted socket would probably open up with the torque that may be required for removal, and some had suggested using a SS band clamp on the socket to keep the slotted socket from expanding. (didn't like that idea). AND, the long slotted socket WOULD NOT allow placing over the sensor wires and seat fully on the sensor hex portion. The bit longer slotted heavy crows-foot has a preferred 1/2 inch drive but had much thinner sidewalls than the shorter slotted crows-foot, which was a 3/8 drive. (see pix). As I wanted to remove ALL sensors intact, without cutting off the wires and using the 22mm 6 point DW socket, my thought was to use the shorter, slotted heavy crows-foot even though it was for a 3/8 drive. I was ready with the socket adapters - 1/2 to 3/8 adapter so to be able to muscle any tight sensor with the preferred 1/2 ratchet. For sheets and grins, I tried my Craftsman 22mm OE wrench, yea, I know, you shouldn't, but, I was able to loosen three of the four sensors with this OE wrench due to open access to the sensors and got lucky - and the fourth sensor - see short slotted heavy socket on sensor in pix - was easily removed with a 1/2 ratchet with the 1/2 to 3/8 adapter. Using a 1/2 ratchet provided a finer loosening and tightening movement in very small increments, not like being restricted to a socket on a square 1/2 drive breaker bar, you know what I mean, when there is little “throw” in the ratchet movement.
FYI – My truck was basically cold with only several minutes running to move from the carport to my flat(er) driveway. The exhaust system was just warm, not hot, when I started work. The picture where you can see the short heavy crows foot socket on the upstream side is from bank 2, passenger side for reference. The very open sensors shown in another pix are of the bank 1, driver’s side for reference.
I did not have to use “plan B” using the 1/2 drive 6 point 22mm DW socket which was to work on a cold exhaust system with cut wires for the 6 point 22mm DW socket use, heat the sensor bung only with a small torch, not the sensor itself, then after the bung was HOT, I had freeze spray ready to cool ONLY the sensor, (on the hex wrench part), so it would contract from the HOT sensor bung and make sensor removal easier. This plan was at the ready but did not have to use as all sensors only required ~20-25 ft lbs torque to remove and was easily accomplished with the 22mm OE wrench on three sensors. The fourth sensor, bank 2, upstream – shown in pix, needed the short heavy crows foot socket. (This new “pounds feet” designation is BS due to some sob’s decision to be more “politically correct”. To that I say STFU……… For me it will always be ft lbs… A good suggestion is to make certain you CAN loosen ALL of your sensors FIRST, NON-DESTRUCTIVELY, and NOT disconnecting any connectors, before changing any, since this is the hardest part you DO want to accomplish FIRST, and, IF you could not remove any of the sensors yourself, you would need to only retighten your sensors a bit for your drive to the shop for removal if needed. The rest is all downhill easy peasy…. My work time was about 2 hours or so, due to 2 years previous back surgery and not having a creeper, which was a real biatch…. P.S. ALWAYS use dielectric grease on electrical connectors and plugs to prevent any moisture or water intrusion. Just squeeze a small bit on the “face” of the new sensor connectors as shown in the pix with a small amount pushed into the connector “holes” and you’ll be good-to-go….
Images in this review
-
ezequielReviewed in the United States on June 10, 2025
5.0 out of 5 stars excelente
Verified Purchase10 de 10
- CasemanReviewed in the United States on May 14, 2025
4.0 out of 5 stars I managed to break one.
Verified PurchaseThese work, although I did manage to break one. That might have been my fault. I have an old Volvo, and every part is tucked somewhere unreachable. O2 sensors are in a very difficult spot. Using this tool I was able to replace them, but I snapped one of these while trying to loosen a sensor. I used the smaller socket and it worked fine. Also for 22mm sockets they fit just a tad loose, but tight enough to do the job.